photo home_zpsf660307b.jpg            photo follow_zpsf3eeb6e5.jpg         photo tutes_zps2632b987.jpg         photo galleries_zpsbe72ef9d.jpg
Showing posts with label S4S. Show all posts

8.09.2010

S4S- Clothing, Part 1

My absolute favorite part of blogging is making new friends-- often from many different parts of the world. One of my newest bloggy friends is The Sewing Dork. Not only does she have some fabulous ideas, and an amazing stash of fabric, but she is hilarious. There is nothing better than a friend who can make you laugh.
She has graciously added a cute tutorial to my Sewing 4 School series. I can't wait to make a pair of these for my girlies!
. . . . . . . . . . . . . . . . . . . . . . . . . . . . . . . . . .
Dress up some courdoroy pants with a little apron.


And a fun pocket too.


Here's how: Using an existing pair of pants as your template, cut four from fabric. Remember to add room for seam allowances all around, and extra at the top for adding a casing for an elastic waistband.


With right sides together, you will have two pairs like this.


Sew each inner leg seam.


Open up the parts you have just sewn and lay one on top of the other (right sides together). See that big horseshoe at the top? Sew it all up.


When you turn your pants right side out they will look like... ta da... pants!


The pocket is made from two squares of fabric. Fold them in half lengthwise and cut/curve the bottom as shown. Sew right sides together, leaving the top edge open for turning.


Before you sew up the outer leg seams, position the pocket where you want it (remember you will be folding down the top for an elastic casing, so set your pocket lower for now) and sew into place. Now stitch the outer leg seams closed.


On to the fun apron! Cut out two identical pieces - one front and one back.


How big? Not quite as wide as the finished pants and about long enough to hang to the crotch seam on the finished pants.


Embellish the FRONT of your apron with ribbons, buttons and trims as desired. With wrong sides together, sew the apron front to the apron back leaving the top open for turning. Turn right side out, fold in the top neatly and topstitch all around.


Back at the pants, finish the top edge (either zigzag or serge) and fold down to make a casing for an elastic to thread through. Do not put the elastic in yet. First, position the apron to line up the top with the top of the pants. Carefully stitch just around the top, very close to the top edge. This will hold the apron in place and will also give you a nice look to your elastic waistband.


See where the elastic is going to sit? You can thread it through now.


This the look of the finished waistband.


Hem the pants. Test drive them.


A nice little twist on back-to-school clothes.


8.06.2010

S4S: It's Cold Outside, Part 3

I am trying really hard not to cry. . . Really, REALLY hard!

K2 will be starting school this year. How is it possible that she is old enough for school? In no time I won't have anybody at home!
Tragic.


In keeping with trying to be a better mother this year, I needed an additional scarf to keep everyone warm.


I was thinking I wanted to do a scrappy scarf and when I started sorting through my scraps, looking for inspiration, my favorite scraps were my selvedges. And how perfect for a scarf!


Materials needed:
muslin
LOTS and LOTS of selvedges! I was suprised at how many I used for a kid-sized scarf!


Cut your muslin about 9 inches wide by the length of fabric (about 40+ inches). If you want to make an adult version, you can add a little more length.

Start at one end and sew one strip of selvedge onto the muslin along the top of the actual selvedge. The bottom of the selvedge should be just below the selvedge of the muslin. Make another stitch at the top of strip of fabric, as shown in the picture:


Add your next strip, so that the bottom of your selvedge strip slightly overlaps the first strip. Stitch along the top of the selvedge and the top of the strip, same as the first.


Continue adding strips until you reach about an inch below the very middle line of the muslin.
Turn the scarf around and start from the other end. Sew the selvedges on the same way, only with the selvedge toward the bottom of the second end.
When you are about an inch from the middle coming from the other direction, stop!

Now take two selvedge strips, and with wrong sides together, stitch across the top of the two strips. It should look like this when it is unfolded:


Attach to the middle of your scarf by topstitching along the middle and then again at the top of the selvedge portion.
Trim the scarf along the two long sides.


Fold the scarf in half, lengthwise, with right sides together and press.


Stitch along the long side.


Turn right side out. Topstitch along the two long sides and across the bottom selvedges on both ends. To keep all your little selvedge 'flaps' from crinkling, start in the middle of the scarf and go down to one end, then return to the middle and go down the other direction.


Whew! Now I can go back to being in denial. I still have 4 weeks. . .


8.01.2010

S4S- It's Cold Outside, Part 1 (and Giveaway!)

A round-up of all my favorite jacket and coat patterns:

Urban Hoodie PDF Pattern by Heidi and Finn


And from my current favorite book, Sewing Clothes Kids Love:


The Silver Lake Windbreaker The Avalon Jacket


I am still copying and tracing patterns, so I can't show you what I have made yet using this fab book, but I love it! It is fun, versatile, easy to understand. . . Did I mention that I LOVE this book? So, let's give one away, shall we? For a copy of the book, Sewing Clothes Kids Love by Nancy Langdon and Sabine Pollehn leave a comment on this post. Winner will be announced August 15th. And don't forget to leave a way for me to email you, should you be the winner.
And if you just can't wait. . .


7.30.2010

S4S- Extra-Curricular Activities, Part 3


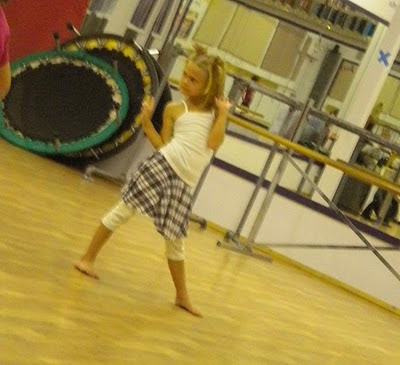
This summer K1 and K2 took their first dance class.
We had nothing to wear!
So, I whipped up a couple little twirl skirts for the girlies-- super easy and fun!


Here's the how-to:


Supplies needed:
about 1 yard of knit fabric
about 20 inches of string/yarn/thick thread
dressmaker's pencil or marker of some kind


The basic concept is that you are going to make a larger circle for the skirt with a small circle exactly in the middle for the waist, then add a waistband.


Make sure you wash and dry your knit fabrics before you use them. I am not really one to pre-wash, mostly because I am lazy. But with knits, you never know how much or which way your fabric might shrink.

Pre-wash!

Cut one strip that is 10 inches wide by your child's waist measurement minus two inches. This should equal somewhere between about 20 and 25 inches if your girlie is between age 2 and 8.


This is your waistband.


Now we are going to make our circle. For my 6 year old and 5 year old, I wanted the skirt about 10 inches in length, but I wasn't extrememly worried about the length. With the waistband, we will need about a 32 inch by 32 inch square or slightly larger of fabric.

Fold the fabric in half and in half again. Cut about 20 inches of string.

Now, in my little world of winging it and just making do, I use a safety pin stuck in the carpet to make myself a circle. I am certain there are better/easier/more effective ways to create a circle. This works for me! ;0)


Cut about 20 inches of string. Use your safety pin to attach one end of the string to the very corner of your folded fabric.


Tie a pencil or marker on to the other end of your string, so that the measurement between the pin and the pen is 15 inches.


Carefully mark your circle, keeping the string taut the entire time.

Move your pen up to 4.5 inches from the pin and mark your waist circle.

Cut out both circles.


Sew your waistband together on the short ends. Fold in half with wrong sides together. Baste the bottom edges together.


Pin the skirt to the waistband in the front, back and two sides.

Sew the skirt to the waistband, stretching the waistband as you go to match the skirt.


And that's it! Unless you are super ambitious and want to finish the edges of your skirt. But since it is knit, it won't fray. And if you are REALLY talented (like me!), you will manage to catch the selvedge on the hem of your skirt. Totally planned it that way. . . TOTALLY.


Time to twirl, plie and jete!


7.27.2010

S4S- Extra-Curricular Activities, Part 2

With all those sports coming up in the fall, how do you keep your girlies hair out of their eyes, while still looking their best?


Here is my solution:


The Do-Rag Sports Headband


It stays in place, keeps hair out of eyes, is one of the most comfy headbands ever, is totally adorable, and it is even reversible!


Doesn't get much better than that. . .


Here's how to make your own:


Supplies needed:

1/4 yard of two different cotton fabrics (or larger scraps work perfect, too)

about 8 inches of 1/2 inch or 3/4 inch elastic


For Mama size: Cut 1 piece of each fabric that measures 13" by 8" and 1 piece of each fabric that measures 1.5" by 12 ". Cut the elastic 8".

For Girlie size: Cut 1 piece of each fabric that measuring 12" by 6 " and 1 piece of each fabric that measures 1.5" by 9". Cut the elastic 6".

For Lil Bitty size***: Cut 1 piece of each fabric measuring 11" by 5" and 1 piece of each fabric measuring 1.5" by 9". Cut the elastic 6".


*** Note: You will need to decide what is safe for your little one. For my two year old I feel that this headband is perfectly fine, but it will depend on your child!


Sew the larger pieces together along both of the long sides, with wrong sides together. Turn right side out and topstitch along both sides.


Sew the smaller pieces together along both of the long sides, with wrong sides together. Turn right side out.


Take your large piece and hand-gather one end so that it measures about 1 inch when it is all gathered together.


Baste your gathers close to the raw edge. Repeat for the other side.


Place the elastic piece on top of the gathers, with about 1/3 of an inch over the gathers. Stitch in place. Go over the seam several times so that it will not pull out when stretched.


Now take your smaller fabric piece and thread the elastic through it, so that one end of the casing covers the bottom end of your gathers. You will also want to tuck the end of the casing in about 1/4 of an inch so that the raw edge does not show. Once you get your casing in place, so that it covers the elastic and the raw edge of the gathers, stitch it into place.


Pull the un-attached end of your elastic all the way through the other end of the casing and attach to the other gathered end in the same way as above.


Pull the casing over the gathers on the second side, just as before and stitch into place.


These are so fun and easy, you might just want to make one for the whole team!


Or maybe, just one for you!


PS This also works great for those days you wake up late. Throw the headband on and done!