

So, here it is. The final piece of the Musketeer costumes. . . and perhaps the trickiest. You will have to forgive my pictures. I just don't have it in me to make a new hat to take pictures for the tutorial, so I used our old hats. Sorry! Hope it is still clear enough.
Materials Needed:
1 yard Peltex extra-stiff double-sided fusible interfacing (HAS to be the stiffest you can find!)
1.5 yards of satin
1 yard narrow gold trim
2/3 yard wide gold trim
1 large pink ostrich feather ***
1 pkg. matching extra wide double fold bias tape
craft glue

(Either of these will work . . .)
The first thing we need to do is draft a pattern to fit your little Musketeer. Measure around the head of your little one, just like they used to do at the doctor when they were little babies.
The brim should be drafted as shown in the picture below:
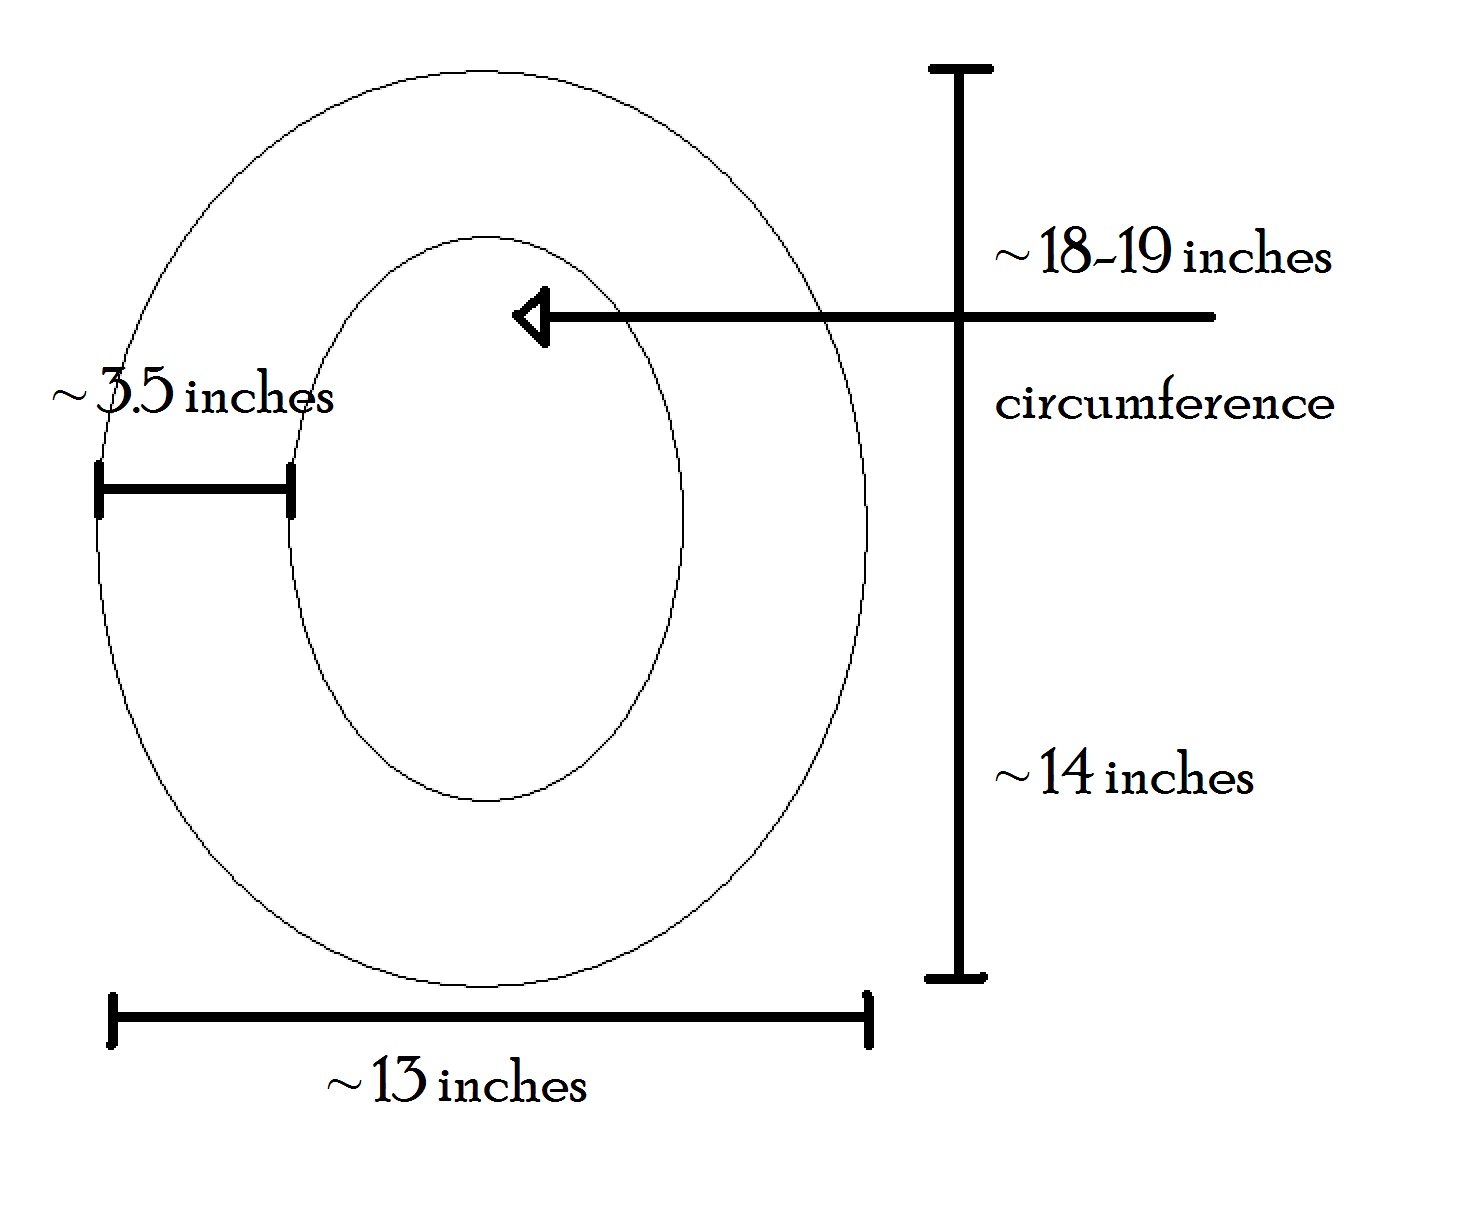
The inner circle needs to be large enough for your kiddo's head. Use your measurement and add about 1/2 to 1 inch to the circumference. For my 5 year old, the above measurements fit her, but she is pretty petite. Adjust as needed.
The very top of the hat should be about 1 inch smaller in circumference than the inner brim ring (about 17 inches). A good way to draft this part of the pattern is to cut out the brim pattern, leaving the inner circle intact, trim it down about a quarter of an inch all the way around and there you have it.
Okay, the hardest part to draw is the crown.

I would suggest making each of these pieces in cardstock, taping it together and trying it on your little one to make sure you have an okay fit and that your pieces will fit together well.
Once you have a good pattern, use the pattern to cut out the stiff interfacing, one of each piece.
Follow the instuctions that come with your interfacing to cover each piece on both sides with your satin. Now, if you can't find the fusible interfacing, you can also use spray adhesive to attach the satin to the interfacing.

Just be forewarned that sometime it does create blotches on the satin that don't come out.
Okay, and the important part-- You need to leave some extra fabric around the edges of the pieces.
Iron or use your spray adhesive to attach the fabric to one side of your interfacing piece.

Then cover and adhere the other side with another piece of satin that is larger than the interfacing piece.

Trim the fabric so that there is just about 1 inch around all sides of your interfacing.

Finish each of the three pieces this way.
Okay, now the pieces are ready to be sewn together.
I used my rolled hem edge to finish the edge around the brim. If you don't have that ability, it may work to put bias tape around the entire rim. You could sew it in place or glue it. I haven't tried it, but I assume it would work. And if you do decide to do it that way, you will want to trim the fabric to the edge of the interfacing around the outer edge of the brim.
Add your narrow gold trim to the top edge of the brim of the hat.

Sew the two ends of your crown together using a 1/4 inch seam (don't use anymore or it won't fit!). Hand sew the top of the hat to the top edge of your crown. I know. . . I know. . . hand sewing is not my favorite thing either, but I just was unable to get it together smoothly any other way-- and believe me, I tried!

Hand sew the brim to the crown, keeping your raw edges inside the hat.
My hand-sewn seam did not look that great, so I glued bias tape around the inner edge of the brim/crown seam.


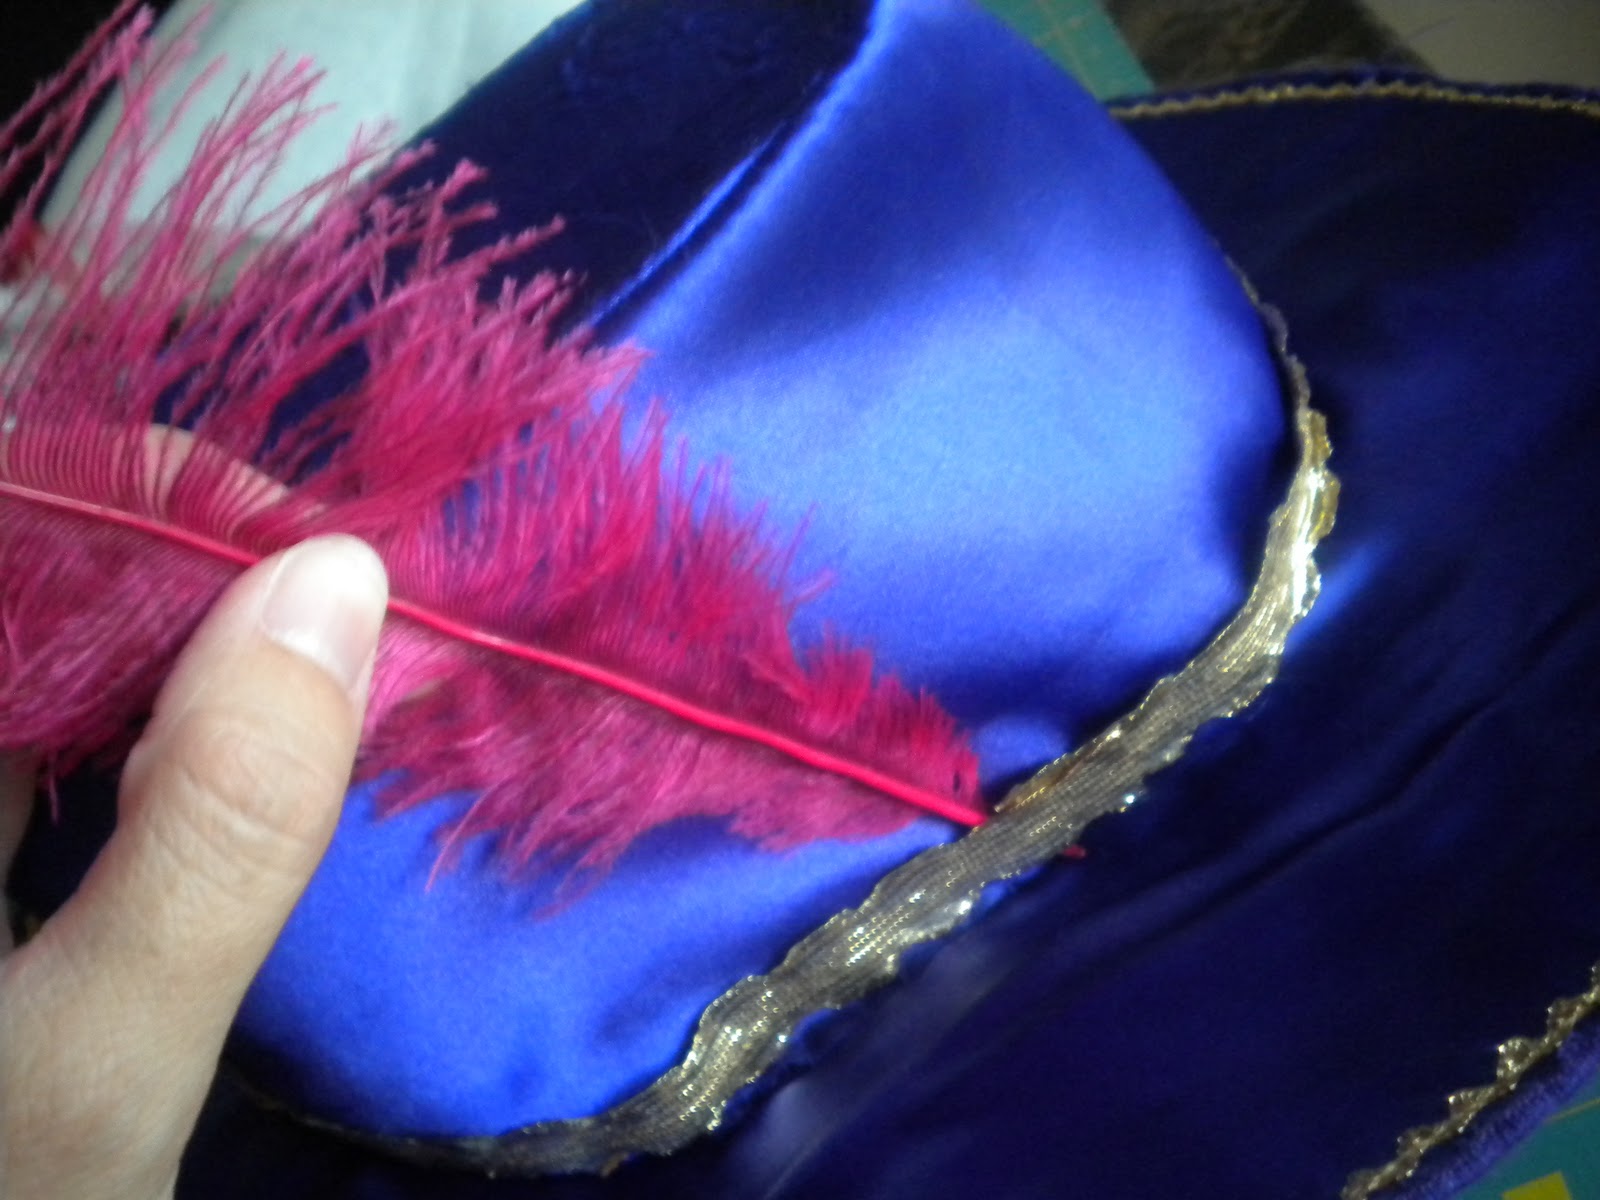
Glue the wide gold trim at the bottom of the crown, right at the edge of the brim. Have your ends meet on the side you plan to attach your feather.
Glue and/or sew the end of the feather just under the gold trim where your ends meet.
On the same side as the feather, attach the edge of the brim to the crown of the hat, so that it bows out slightly and has a true Musketeer feel to it.


Whew!
And that is it. We are all done. If you made it through all seven pieces, three cheers for you! I would love to see a picture. . .
4 comments:
Wow, what a great finish to the costume!
Thank you so much for the hat tute I will be on my way to the Joann's fo the supplies today. I hope that I can draft it all together right, wish me luck. I will send you a link to my blog when I am done so that you can see the finished product. Thanks again.
Super cute!
Do you sell these costumes? I could make the shoes but I don't know how to sew the rest. My daughter wants to be the pink musketeer and she saw this costume and fell in love with it. She is a size 4/5. Thanks for your help!
Shelley
sebekluz@sbcglobal.net
Post a Comment